Fifteen Minutes, One Corner of the Living Room: How Apartment Dwellers Can Build Genuine Self-Defense Skill at Home
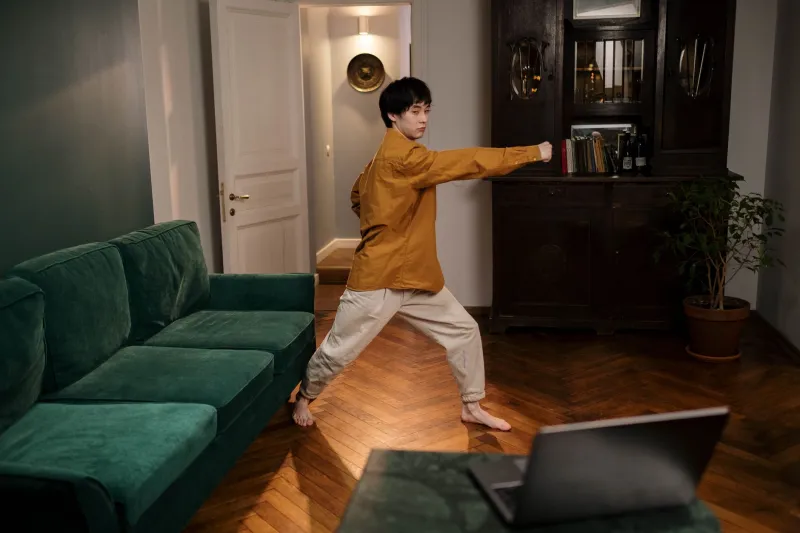
The most common excuse for not training self-defense is also the most avoidable: "I don't have the space." Across American cities, millions of people live in apartments and condos where a heavy bag would send shockwaves through the floor and a full sparring session would end in a noise complaint. But here's the uncomfortable truth the industry rarely admits — the foundational skills of personal protection can be developed in a space roughly the size of a parking spot.
The real barrier isn't square footage. It's structure. Without a coach watching and a class schedule holding you accountable, home practice tends to drift into aimless shadowboxing. This guide fixes that.
Why Small-Space Training Actually Works in Your Favor
Conventional martial arts classes often reward volume — more kicks, more rounds, more sweat. But self-defense skill is built on a surprisingly narrow set of attributes: recognition speed, gross-motor technique under pressure, and the ability to generate power at close range. None of these require a 2,000-square-foot training hall.
In fact, tight quarters are a feature, not a bug. Most real altercations in the United States happen in confined environments — parking garages, stairwells, bar bathrooms, the narrow gap between your car door and the next vehicle. Training in a small apartment replicates the spatial constraints of the environments where you'd actually need these skills.
Setting Up Your Training Corner
Before your first session, designate one area — ideally 6 by 6 feet of clear floor. Move the coffee table, roll up the rug if it slides, and identify what's breakable. A few minutes of preparation prevents a broken lamp and a strained ankle.
Budget-Friendly Equipment Worth Owning
You can build a serious home kit for under $150:
- Wall bag or canvas striking pad: A traditional sand-filled pad that mounts to any wall with velcro or hooks. It absorbs strikes without the noise and footprint of a freestanding bag. Cost: roughly $20–40.
- Reaction ball: The hexagonal rubber ball that bounces unpredictably. Ten minutes of catches dramatically improves hand-eye speed and reactive timing. Cost: under $15.
- Resistance band set: Essential for solo technique work — bands simulate the resistance of grabbing, pulling, and pushing, which shadowboxing alone never provides. Cost: $20–30.
- Foam training knife and soft prop: For awareness and disarming drills. Cost: $10–20.
- A full-length mirror or your phone's camera: Arguably the most important tool on this list. Video review exposes the flaws your proprioception hides from you.
Skip anything that requires installation, makes significant noise, or invites a landlord conversation. Silence is a constraint — train within it.
The Anatomy of a 15-Minute Session
Consistency beats duration every time. A focused quarter-hour practiced five days a week will outperform a sporadic two-hour weekend marathon. Here's the template:
Minutes 0–3: Movement prep. Joint circles, hip rotations, and light footwork patterns. Get warm, get loose, get present.
Minutes 3–8: Technique block. Pick one focus per session — a palm strike, a basic wrist escape, a defensive frame. Work it in slow motion first, then at half speed, then at full intensity for short bursts. Ten clean repetitions with attention beat fifty sloppy ones.
Minutes 8–12: Reactive work. This is where the reaction ball earns its keep, or where you drill responses to a band's resistance. The goal is forcing your body to solve problems rather than recite patterns.
Minutes 12–15: Scenario visualization and cooldown. Walk through a mental rehearsal — the parking garage, the elevator, the jog on a quiet trail. Research on motor learning consistently shows that vivid mental practice reinforces physical drilling. Then stretch.
A Sample Weekly Schedule
- Monday — Striking fundamentals. Wall bag work: jab, cross, palm heel, elbow. Focus on hip rotation, not arm strength.
- Tuesday — Reactive training. Reaction ball drops, band-resisted escapes, mirror shadowboxing with random movement.
- Wednesday — Rest or light mobility. Recovery is part of training.
- Thursday — Escapes and frames. Wrist grabs, bear hugs, and creating distance — all safely self-drilled with bands and visualization.
- Friday — Scenario day. Combine the week's techniques into short mental and physical scenarios, filmed on your phone for review.
- Weekend — One longer session if desired, or review video footage and plan next week's focus.
Video Resources Worth Your Time
The internet is flooded with martial arts content of wildly varying quality. Prioritize these categories:
- Gracie University and similar structure-based programs offer progressive curricula designed for solo and partner practice at home.
- Nick Drossos and other reality-based self-defense channels provide accessible breakdowns of pre-attack indicators and de-escalation — knowledge that requires zero floor space.
- University Extension and law-enforcement safety videos for situational awareness frameworks.
Apply a simple filter to everything you watch: does this instructor explain why a technique works, and does it depend on gross motor skills that hold up under adrenaline? If the answer to either is no, keep scrolling.
Know the Ceiling — and When to Seek a Live Partner
Honest training means acknowledging limits. Solo practice builds mechanics and conditioning, but it cannot replicate the weight, unpredictability, and resistance of another human being. Once your 15-minute habit is established — give it six to eight weeks — look for occasional opportunities to pressure-test: a weekend seminar, a single self-defense workshop at a local community center, or periodic sessions with a training partner who's willing to push you.
Start Tonight
Clear a corner. Set a timer for fifteen minutes. Pick one technique and drill it with attention. The apartment you believed was too small is, it turns out, exactly the right size for the training that matters most — the kind you'll actually do.